Use these DIY tips to install your bathroom tiles

Today, we’ll discuss a bathroom renovation difficulty that may look to the ordinary Joe to be oh-so-simple, but let’s be honest: Because you and I aren’t typical Joes, picking bathroom tile may be a difficult task – particularly when costs are involved, which, let’s face it, they almost always are.
Take it from someone who has been searching, comparing, ordering, feeling, measuring, tasting, and fantasizing over tiles for the last two weeks: When you have millions of bathroom tiles alternatives to pick from, deciding on one or two is a difficult task.
So, without further ado, here are a few things I’ve learned about bathroom tiles so far. I hope you find these recommendations helpful if you ever decide to do your own bathroom makeover. You may always go back to this article to remind yourself that if I can accomplish it, so can you!
Girl, you’ve got it!
FIRST AND FOREMOST, DO YOUR HOMEWORK.
The following are the most prevalent varieties of bathroom tiles when it comes to materials:
Tile made of ceramic: Ceramic tile is one of the most affordable solutions, and it’s ideal for wet areas like the bathroom. It’s simple to set up and maintain, and it’s usually one of the simplest solutions. Just make sure you’ve done a slip test on a sample if you’re using a high-gloss ceramic alternative.
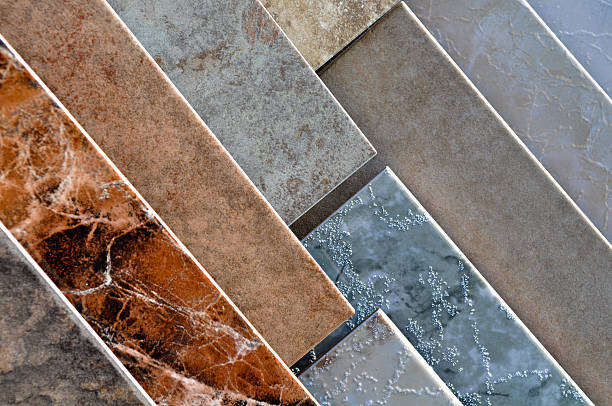
Tile made of glass: Glass bathroom tiles are a popular choice for the backsplash because it adds flair and depth to any area. It is often more costly than ceramic ones. Keep in mind the slip-resistance element, like with high-gloss ceramic tile; glass tile is more slippery owing to its smooth surface, so use it on the walls instead of the flooring.
Stone tile: If you want a more natural look, go for stone tile. Keep in mind that most stone tiles aren’t waterproof, so they’ll need to be treated correctly to survive. Marble bathroom tiles, for example, is a more costly alternative that provides a rich vibe to the area, but it’s also high-maintenance since it cracks, stain, and scratch quickly.
Porcelain tile is a kind of ceramic bathroom tile that comes in a variety of Porcelain tile is also one of the more costly alternatives, but it offers a worry-free experience, making it one of the most popular choices on the market today. It absorbs extremely little water because of its hard and durable surface, making it an ideal bathroom material. However, installation is a difficult task, so leave it to the pros.
There are simply too many alternatives to cover in terms of form, pattern, or arrangement, however, the following are some of the most prevalent patterns. Click here to read about Consider these benefits and tips when selecting herringbone tiles.
TRY A SAMPLE BEFORE BUYING
Customers are probably aware of my Wayfair infatuation, so imagine my joy when I discovered that the home design and renovation giant allows you to purchase FREE tile samples.
Yes, you read it correctly: FREE tile samples!
Even if you’re not buying your bathroom tile from Wayfair, some home improvement stores, such as Home Depot or Lowes, will let you buy samples for a few dollars, which is still a far better option than buying a hundred square feet of black bathroom tiles only to discover that it makes your powder room appear teeny-tiny – or, even worse, buying a hundred square feet of super shiny bathroom tiles only to discover that super shiny is synonymous with super slippery (read: not ideal for a shower).
You can obtain a good feel of whether the bathroom tiles suit the room design, double-check the size, and soak-test the tiles for quality control by sampling before purchase.
In the spirit of sampling, I’ve included two of my favorite marble herringbone samples from Wayfair, each of which cost more than $20 per square foot. However, as demonstrated by several of your Instagram comments, it seems that this design is a favorite of many. Visit http://exithomevets.net/uncommon-tips-for-your-bathroom-tiles/ to read about Uncommon tips for your bathroom tiles.
SELECT YOUR TOP THREE OPTIONS
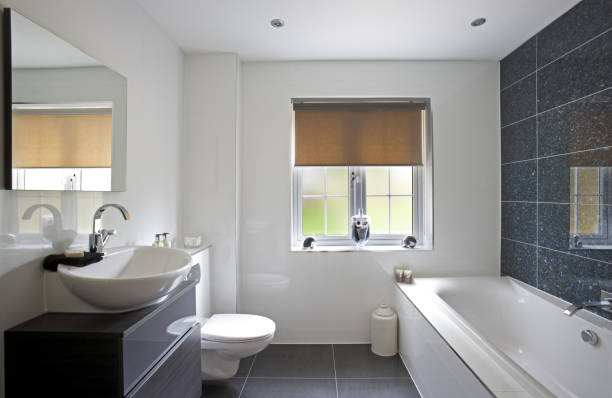
It’s time to start narrowing down what you want once you’ve read the reviews and tried out the numerous samples. If you’re anything like me (read: absolutely naive about tile), you’re probably thinking about what else has to be tiled except the shower. While there is no ultimate right or wrong answer (it is your home, after all), most people tile the shower, the floor, the area around the tub, and potentially a statement wall, which is generally the wall behind the bathroom vanity. If you don’t want to wind up with a kaleidoscope of patterns instead of a fashionable, well-designed bathroom, just because there are four separate rooms doesn’t imply you need four bathroom tiles selections.
The trick is to limit yourself to three tile selections. To add a little of a wow element to the area, choose one statement tile with a distinctive form, texture, or color, such as Moroccan (also known as arabesque). Opt for more basic alternatives in the same color palette for the other rooms to prevent the space from feeling too fashionable.
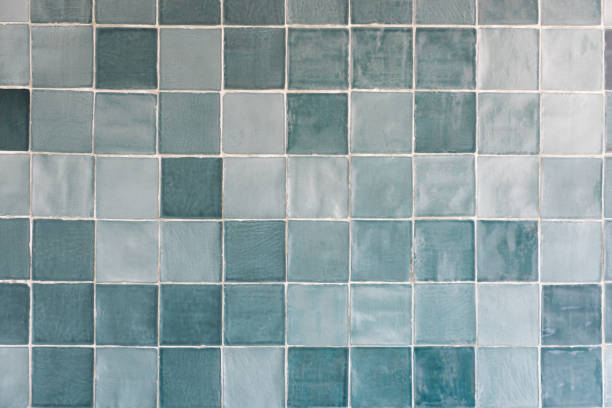
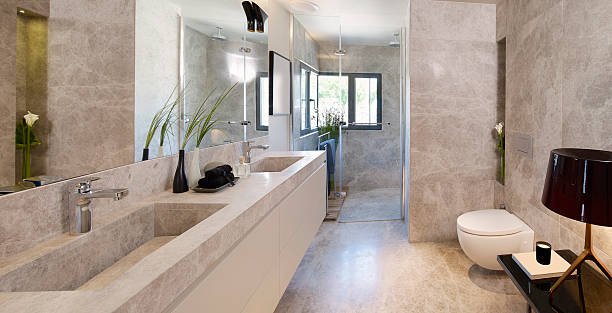
USE A LIGHT COLOR PALETTE TO MAXIMIZE THE SPACE
In terms of color scheme: Using light and neutral colors in the bathroom, like in any other room in the home, optimizes the space. It’s a quick and easy approach to give the impression of being more costly. Keep things from becoming too monotonous by using varied textures of the same color to provide depth.
Another fantastic approach to maximize space – while not the most cost-effective – is to tile the walls all the way up to the ceiling. Floor-to-ceiling tiling lengthens the space, giving the impression that it is much larger than it is. Consider extending the bathroom tiles just on one feature wall to get the fashionable European appearance without having to tile the whole bathroom, which may be costly.
MEASURE EVERYTHING AND REMEASURE IT
After you’ve decided on the material, color, and pattern you want to use, it’s time to tackle the not-so-fun part of the process: calculating how much your options will cost you. Measure the length and breadth of the area you’ll be covering with tile, then multiply the two numbers. Add 10-15% to your estimate to account for breakage and emergencies, as nothing is more frustrating than nearly finishing a tiling project only to discover that you still need a few square feet of a tile that has since been discontinued (speaking from personal experience, though I have heard horror stories!).
Check out: 10+ Helpful Tips For Creating Bright Living Room Ideas